A practical guide for snow professionals comparing route performance, equipment fit, and winter readiness.
Treat dim light as a system symptom
A weak lamp can come from voltage loss, corrosion, poor grounding, moisture, or an aging light source. Winter equipment should be judged as a complete system, with the vehicle or carrier, operator, material, and route considered together. Record battery voltage, grounds, connectors, lens condition, and output on both sides. Those details turn a broad product search into a conversation about real work and make later setup choices easier to defend.
A sensible first move is to compare the full circuit before ordering a replacement lamp. This is also where blaze bar lights belongs in the comparison, because a product label matters less than the result it can produce on a cold, busy route. Watch for assuming brightness problems that almost always begin inside the housing; it can create downtime or poor control after the forecast has already arrived. The target is a repair that fixes the actual cause. Write down the setting, load, surface, and weather together so a useful result can be repeated by the next operator.
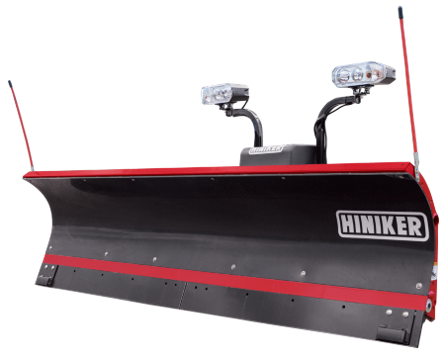
Snowplow headlights and what their performance should prove in the field
This part of the decision becomes clearer when the crew stops treating route conditions as background noise. In this case, plow lighting has to remain stable through vibration, spray, and repeated connect-disconnect cycles. Check beam aim, high and low functions, mounting rigidity, switching, and glare more than once and under a realistic load. A short stop for inspection often reveals more than another fast pass through an easy section. For snowplow headlights, that habit matters because a small compatibility or setup problem can repeat at every property.
Use the equipment long enough to test every mode with the plow attached and the truck on level ground. The comparison may also include snowplow electronics. Ask what changes when the temperature drops, the material gets wet, or the route becomes crowded. The common trap is checking lights only with the plow removed. A better standard is usable road illumination in the working configuration. It keeps the purchase focused on visibility, control, material movement, truck limits, and operator confidence instead of a list of features.
Aim changes when the truck changes
Storm conditions rarely stay uniform from dispatch to cleanup. When ballast, spreader load, tire pressure, and plow weight can alter vehicle attitude, the operator needs a setup that is understandable and quick to verify. Use loaded ride height, beam cutoff, left-right alignment, and the approved aiming procedure as the scorecard. Snowplow headlights should respond predictably when one deliberate adjustment is made, and the work behind the machine should show why that change helped.
A practical routine is to aim the lights with the truck prepared as it normally runs. Compare the role of a snow plow accessories dealer at the same moment, especially when it changes weight, clearance, flow, wiring, or the operator’s view. Avoid setting the beam on an empty truck. The better outcome is forward visibility without blinding other drivers. Keep the first test controlled, then inspect again after the equipment has reached normal temperature and has worked under a representative load.
Harness condition matters at every connection
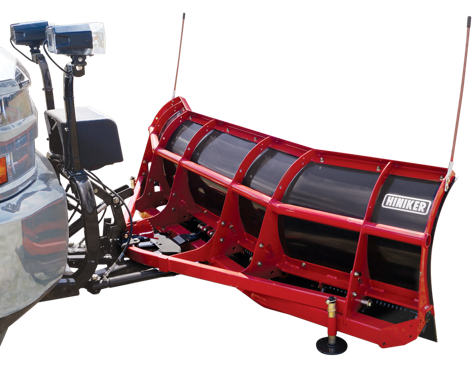
Operators often notice winter connectors face brine, flexing, ice, and hurried coupling in the dark only after several stops have been completed. That is why pin tension, seals, strain relief, routing, grounds, and protective caps should be part of the first-route inspection. Equipment can sound normal while output, alignment, or control is changing. Park safely, secure moving components, and compare more than one operating position before deciding that the setup is ready.
Plan to clean and protect connections using approved products and methods. The role of a snow plow dealer should be evaluated in the same sequence, with the vehicle stopped and the equipment disabled whenever inspection requires it. Do not fall into probing sealed wiring in a way that creates new entry points. Aim instead for lower resistance and fewer intermittent faults. This approach gives every driver a clear baseline rather than a truck full of unexplained adjustments and improvised fixes.
Upgrade only with a compatible package
Capacity is useful only when control and results hold up. Here, new lighting may require specific modules, harnesses, switching, or vehicle programming. Track plow model, truck year, electrical architecture, lamp approval, and installation instructions, then compare the result with the time saved or material used. Winter equipment earns its place by helping the operator maintain an acceptable result through normal changes without constant guesswork. If quality drops, change one setting or condition before adding another variable.
The best test is to verify the complete application before mixing old and new components. Apply the same standard when evaluating a truck snow plow dealer rather than assuming its name guarantees a particular outcome. Be cautious about choosing by connector shape alone. What matters is proper function without unintended vehicle faults. A documented comparison between two setups is more valuable than a long demonstration with no measurements and no shared definition of success.
Carry a nighttime inspection routine
Ownership gets easier when the buying conversation includes the practical issue that a light can pass a daytime check while still producing a poor road pattern. Confirm output, aim, vibration, snow buildup, marker functions, and cable movement and decide who will answer the first question during an overnight event. The final choice should make routine hookup, inspection, cleanout, and service understandable to the people who use it. That practical fit is part of performance, not an extra.
Before committing, perform a final test after dark before the first forecast event. Ask how the available configuration affects the decision and what parts, tools, or training should be ready before the season. Avoid waiting for a driver complaint during the route; it can make a low purchase price expensive when accounts are waiting. Look for time to correct visibility problems in the shop. A good purchase leaves the operator with a repeatable starting setup, a safe inspection routine, and a clear source of model-specific support.
Frequently Asked Questions
Why do my plow lights flicker?
Loose or corroded connections, poor grounds, low voltage, harness damage, or incompatible components can all cause flicker. Test the circuit systematically instead of replacing parts at random.
Can I install snowplow headlights myself?
That depends on the system and your electrical experience. Because lighting may interface with vehicle controls and legal requirements, use the manufacturer’s instructions and qualified service when the application is not straightforward.
Should plow lights be aimed with the spreader loaded?
Aim them with the truck in its representative working configuration, including normal ballast and carried equipment, while staying within all vehicle ratings. Follow the approved aiming procedure.

Reach out to us online at Hiniker or contact us today by calling (800) 433-5620 to find out more about the premium snow removal products we offer. We have been a proud Minnesota-based manufacturer since 1995. We offer the highest quality salt & sand spreaders, snow plows, skid steers, truck plows, accessories, and more!
Our equipment at Hiniker is built to enable the operator to work as efficiently as possible. You can also follow us on Facebook for the latest news regarding Hiniker’s premium equipment and accessories.